

A mod that transport BFME2:ROTWK to the Inheritance cycle universe |
| Welcome Guest ( Log In / Register ) |
 |
Quick Lists Top RatedTutorials Living World Map G� Ultimate beginner'� Arrow scaling bug� Raising Heroes max� Proper Fire Arrow� Creating an asset.� Simple Structure B� Making a simple Ma� Quick and easy sno� Making patrols nea� Mods The Dwarf Holds The Peloponnesian� RJ - RotWK The Elven Alliance� Helm's Deep Last H� The Elven Alliance Special Extended E� Kings of the West� RC Mod The Wars of Arda Downloads BFME1 1.06 Widescr� Enhanced W3D Impor� Fudge's Map Pack LotR/BfME HD Logos Osgiliath Shellmap Crystals Of Ancien� 2v1 Wold The forests of Dru� Converted BFME2 an� ROTWK animations f� |
||||||||||||||||||||||||||
 |
Register and log in to move these advertisements down Animating with use of Inverse Kinematics
This tutorial is for someone who has previous experience with animating and who has good skils with 3ds max. some of procedures that are shown here can be used in Gmax/Renx too but i am quite unsure if you can get the same result with it. First thing to do is to check the links below. Expecially if you have limited to no experience with IK you should check them cause there is nice video tutorial showing how to set up those things. I will show you how to animate sitting idle anim for faramir's skeleton as well as transitional anim from selected state to that idle. So lets get things moving. We start with new max file. Import gufaramir_skn.w3d and delete arrow and arrowbone (the one linked to right hand, we dont need it and i did find way how to hide it in anims as EA do so you will need to hide that later via codes ). Also you can delete cape bones. I have them in first few images but i scratch that in later stage. So the final anim is without cloak for now. I cover that later once i find some good techniqe how to do them. 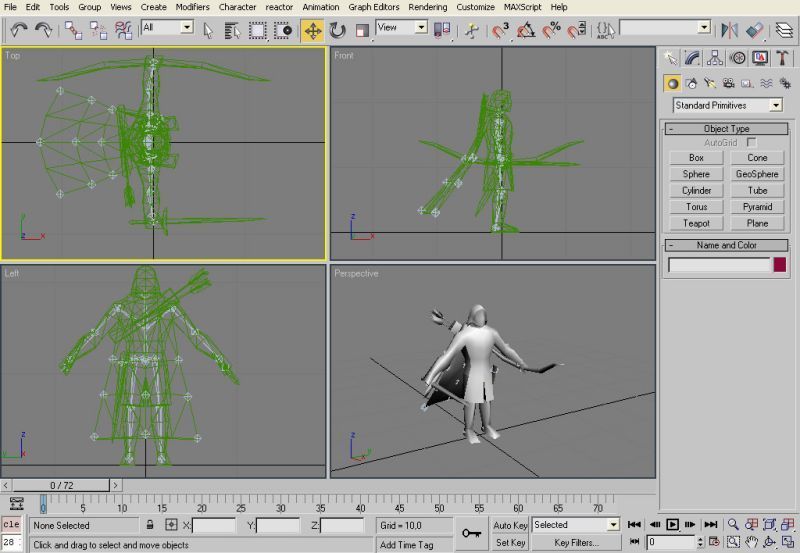 Now divide the model to few parts like, body itself, cloak, sword, bow, quiver and sheat. It is easier for rigging ( binding ) as well as it allows you to hide parts that you dont need at specific stage of work. It is good idea to give diffrent meshes diffrent colors as you can see on the image. With that you can nicely see what is what even on wireframe mode. 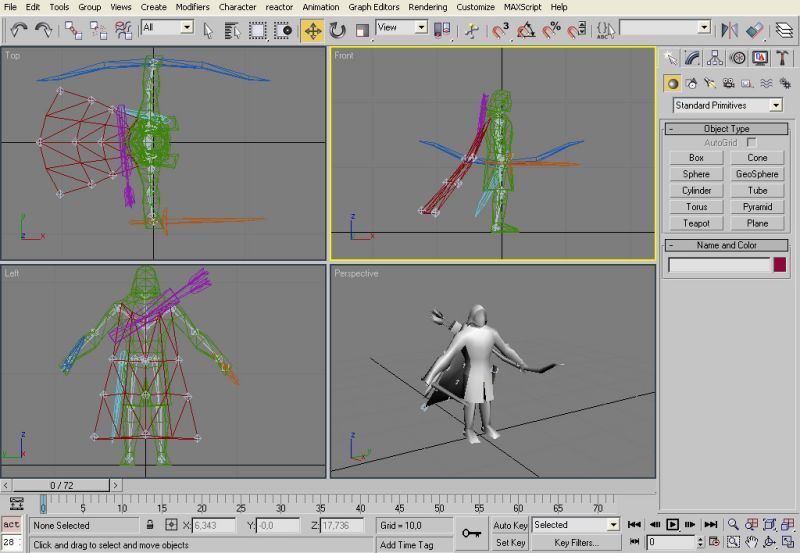 Hide all the meshes and left only bones on the screen and set its export setting on Export Transform. 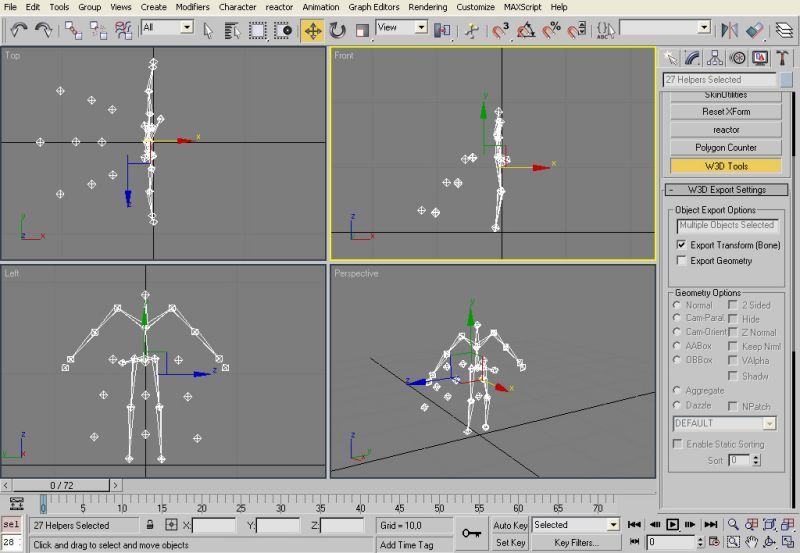 Then you can start with setting up the IK. Set them as you can see on the image bellow. All of them are HI Solvers. You can see how that is done in the tutorial that i mention at the start so take a look at that one if you need some help. 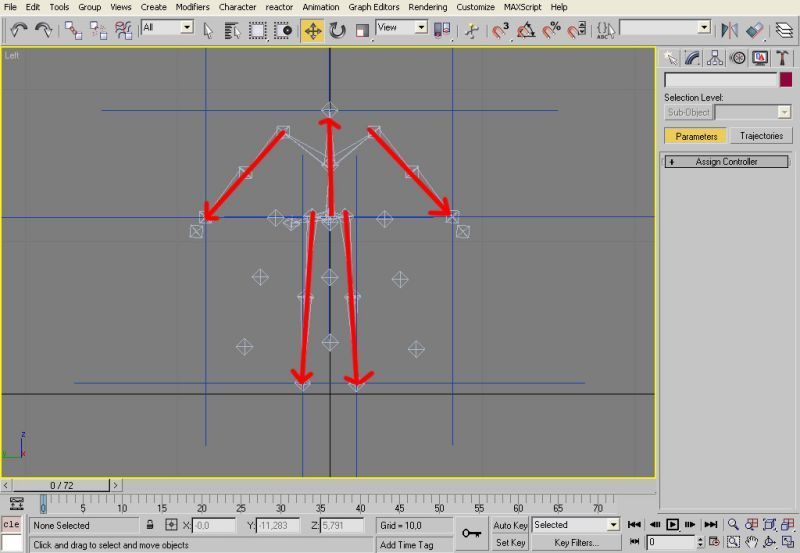 Create 9 nine circles as you can see on that image. Dont bother to aling them we will do that in next step. I prefer having the circles that belongs to one side of the body as blue, the opposite side is green and central ones use violet but this is up to you how you want that. 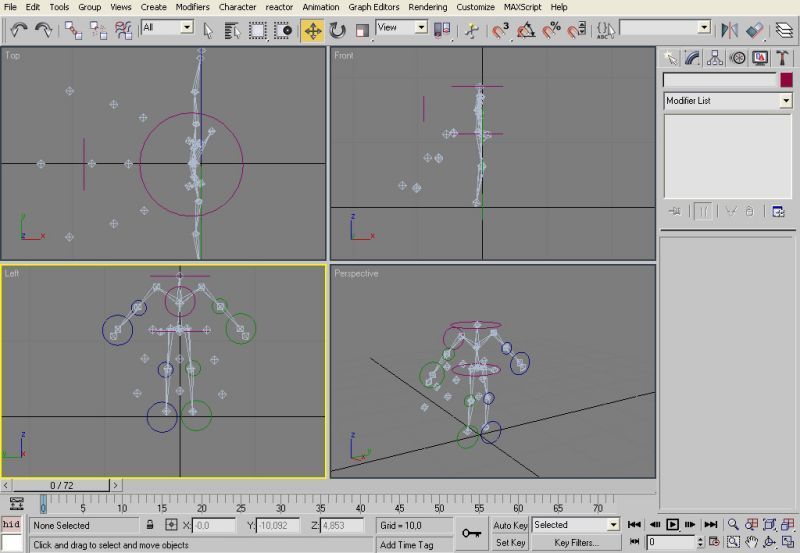 Now i use max's align utility to align those circles to the bones that they belong to ( see tutorial below ). The circles at hands, foots and head are aling to both position and rotation, the rest only to position and with exception of the hip one they are moved away from skeleon for better control. 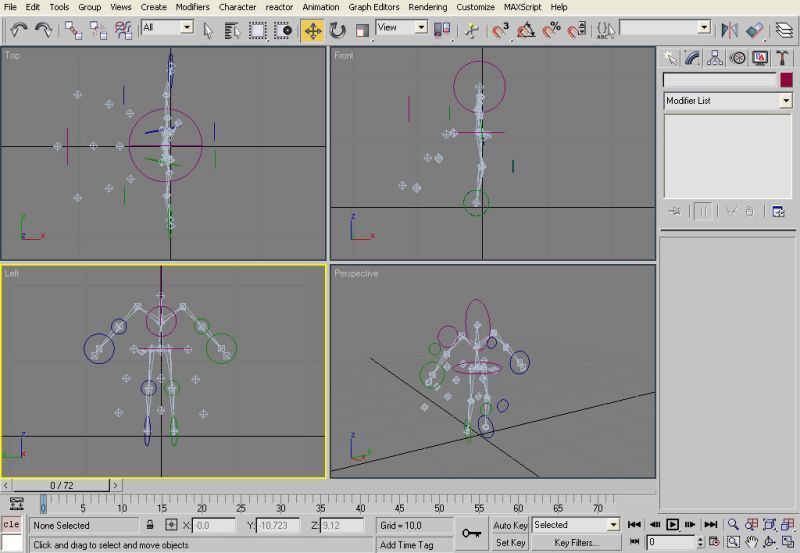 Links / Downloads
CommentsDisplay order: Newest first Maximanbfme2tutnew - Monday May 23, 2011 - 9:25 Hi dude great tutorial. I found out of all but i export it in as like a chera then i open it with W3DViewer i open the animation and it dont do something only stand still like on Timeline 0 PLZ HELP Sulherokhh (Team Chamber Member) - Wednesday August 15, 2007 - 7:06 This is great! :D Radspakr Wolfbane (Team Chamber Member) - Tuesday July 3, 2007 - 3:17 Great Work,This tutorial will really help out modders. Bart (Administrator) - Sunday July 1, 2007 - 4:35 Good work. Tutorials on these kinds of subjects is what the community still lacks :-) |
 |
|||||||||||||||||||||||||

"One site to rule them all, one site to find them, © All Rights Reserved Eric Edwards ©2013. |
|||||||||||||||||||||||||||