|
The Battle for Middle Earth: Expansions 
Will bring back life in to The Battle for Middle Earth 1 |
| Welcome Guest ( Log In / Register ) |
 |
Quick Lists Top RatedTutorials Living World Map G Ultimate beginner' Arrow scaling bug Raising Heroes max Proper Fire Arrow Creating an asset. Simple Structure B Making a simple Ma Quick and easy sno Making patrols nea Mods The Dwarf Holds The Peloponnesian RJ - RotWK The Elven Alliance Helm's Deep Last H The Elven Alliance Special Extended E Kings of the West RC Mod The Wars of Arda Downloads BFME1 1.06 Widescr Enhanced W3D Impor Fudge's Map Pack LotR/BfME HD Logos Osgiliath Shellmap Crystals Of Ancien 2v1 Wold The forests of Dru Converted BFME2 an ROTWK animations f |
||||||||||||||||||||
 |
Register and log in to move these advertisements down Thick-grain Cloth TutorialTutorial for
This tutorial talks of coarse-grained fabrics. These are suitable for lower class people - again for example, Rohan peasants. They'll also do well for warmish winter cloaks. I use a variation on the techniques outlined here for nearly every type of cloth that I make except for fine banners. The methods might not apply to elvish fabrics, because they are so much more elegant and refined. Of course, I could simply argue that I've never actually drawn elf clothes before.... anyways.
We're going to be working with the same Peasant texture from the first cloth tutorial-really continuing from where we left off. First, We can look at the parts of the skin that are constructed of cloth. Following the original layout, we have a 'skirt', the cloak, shirtsleeves and possibly the legs. Just to be safe, we'll do all three. Skirt First, open the document that was crated in the Leather tutorial. You're going to want to make sure the other layers don't get in the way, so select the shirt, strap, buckle, belt and belt engravings layers. Group them via the layer menu (or press Ctrl-V). Name this group 'vest'.Create a new layer, name it 'skirt' or similar. In the layer panel, move it to below the 'vest' group. This way it'll say below the vest, and you can draw over the vest without any worries. On this layer, draw over the old, ugly bit of cloth on the texture. Rohirric clothes are a series of greys, greens and browns, so we'll use a greenish tinged medium brown. Brush should be of varying sizes so that you can best accomplish this. 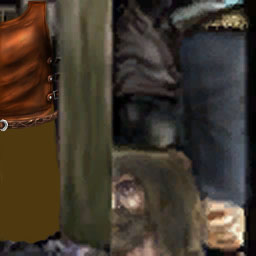 Once this is done, we can proceed to basic highlights and shadows, as usual. Shadow right below the intersection with belt and vest - I suggest a burn brush set on midtones at ~25%, using 0% hardness. This area should be exaggerated, as it defines where the vest ends and emphasizes the belt. You also want to use a burn brush to create a crease where the two sides of the skirt would intersect- in this case at the left edge of the skin. Use a stronger, ~80% hardness brush here. You'll want to make the gap a little larger at the bottom, tapering to near nothing at the belt. the centre of this crease should be almost, if not totally, black. 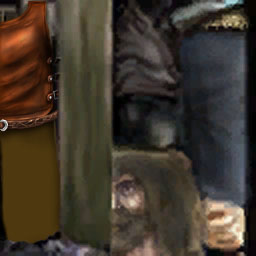 That's the general shadowing. Now, we must apply the general highlighting. This should be done with a dodge brush, a largish one with low hardness. Dodge lightly in the centres, the increase the exposure as you work outwards towards the edges. Again, this accentuates them greatly. Working in downward strokes will also help add to the effect, because cloth generally folds vertically if hanging like this. 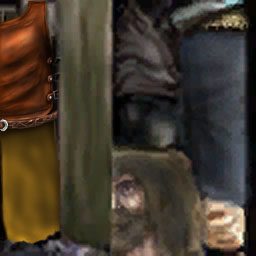 Now that the initial highlighting is done, we can apply the cloth texture. Go to filters -> Texture -> Texturizer. This basic filter applies a patterned texture to your selection- it is sometimes fine to use - other times it just looks odd. Folds in this bit of cloth are mostly minor, so it works here. Set the Scaling to 50%, Relief to 1, and play around with the light direction. For this, I'm going to use Top, but you can simulate other cloth styles by using different directions. Select OK. Do also note that the highlighting messed up the colour, so adjust with the Hue/Saturation controls, back to a browner colour.  Now that the texture is applied, we can add better highlights. First, using the dodge brush of size 5, go around the edges of the skirt again. 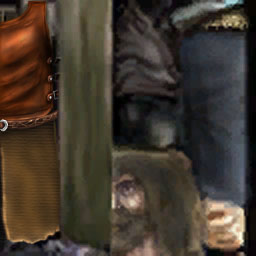 This adds a stiff edge to the cloth bit. Now take a dodge brush on highlights, size 13-19, hardness 0, an exposure of around 25% and begin drawing the highlights of fold lines into the cloth. These should be vertical - and are a completely subjective process. Do it until you're happy with it . Some tips - follow gravity, coordinate with 'bumps' on the bottom of the cloth bit, place the strongest highlights near the edges. folds can be more compressed near areas of compression - ie. around the belt. Correspondingly, use a burn brush on midtones set to roughly the same settings - perhaps a bit smaller - to darken areas around the fold lines you've created. this is just the inverse of the above step. After finishing, you may need to touch some areas up with the desaturate tool, the dodging and burning may have increased the saturation somewhat. 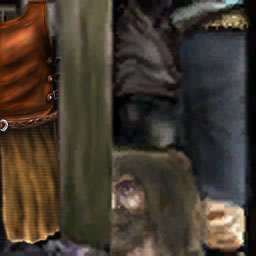 There! now, aside from some grunge addition, which will be done at the end, this stage is done. If you like, you can play around with additional dodging, the saturation, etc, but I like what I got here. |
 |
|||||||||||||||||||

"One site to rule them all, one site to find them, © All Rights Reserved Eric Edwards ©2013. |
|||||||||||||||||||||