
Enhances Visuals, provide series of modifications and additions to the game play,Support Multiplayer |


Enhances Visuals, provide series of modifications and additions to the game play,Support Multiplayer |
| Welcome Guest ( Log In / Register ) |
 |
Quick Lists Top RatedTutorials Living World Map G… Ultimate beginner'… Arrow scaling bug… Raising Heroes max… Proper Fire Arrow… Creating an asset.… Simple Structure B… Making a simple Ma… Quick and easy sno… Making patrols nea… Mods The Dwarf Holds The Peloponnesian… RJ - RotWK The Elven Alliance… Helm's Deep Last H… The Elven Alliance Special Extended E… Kings of the West… RC Mod The Wars of Arda Downloads BFME1 1.06 Widescr… Enhanced W3D Impor… Fudge's Map Pack LotR/BfME HD Logos Osgiliath Shellmap Crystals Of Ancien… 2v1 Wold The forests of Dru… Converted BFME2 an… ROTWK animations f… |
||||||||||||||||||||||||||
 |
Register and log in to move these advertisements down Creating a Morgul Glow Model effectTutorial for
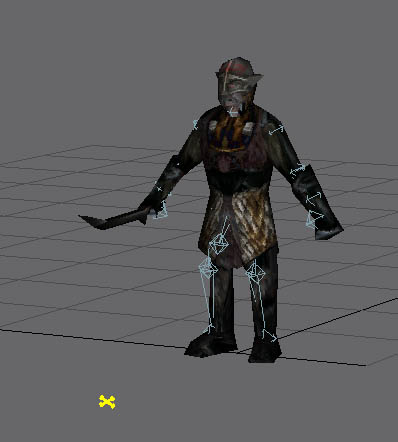
Morgul Glow Model FX Contents- Page 1-Getting Started,model part Page 2-Shaders and Textures Page 3-Extra This will be my very first modelling syle tutorial. In this tutorial I will be teaching how to add a very cool Morgul Glow to a model. This tutorial is intended for those with a good knowledge of RenX. To start with,open your selected model in gmax. For my example I have chosen my Muzgash.  Now select them main mesh using the Select and Move tool (here you can hide everything else if you want). Now clone the mesh by holding shift and dragging the mesh when you stop dragging a dialogue box will come up asking what to do. Use the same options shown in the below image ]Tip:Try moving him slightly forward then slightly back so he is in the same spot as the original.  OK now that you have a second mesh go to the Modifier List Drop down (see below picture) and select push.  The Push tool "pushes" the model outwards similar to scaling up. Now enter the amount to push around 0.04 - 0.06 is a good amount. You want the new mesh to overlap the original.  Links / Downloads
CommentsDisplay order: Newest first kaiba - Sunday March 14, 2010 - 8:26 thank you |
 |
|||||||||||||||||||||||||

"One site to rule them all, one site to find them, © All Rights Reserved Eric Edwards ©2013. |
|||||||||||||||||||||||||||